Solution
For the curious, here is a link to the solution in Robot Structural Analysis:
kratownica1.rtd
Example calculation with comments
Text
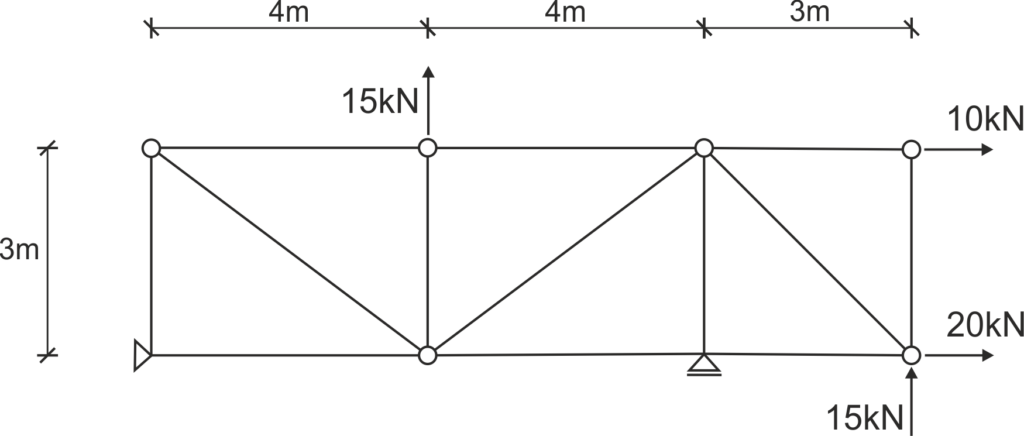
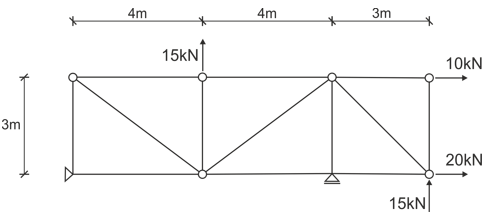
Indicate the zero force members and determine the forces in all members of the given truss using Ritter's method.
Solution
Step 1
Numbering of members, possible marking of nodes, indication of support reactions.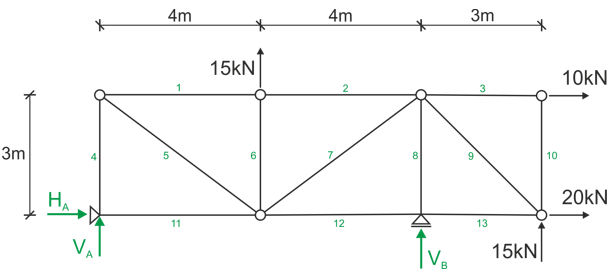
Step 2
Writing equilibrium equations and calculation of support reactions.
Step 3
Making Ritter's cuts.In principle, we can start in any way as long as we don't cut through more than 3 members, because this is the number of unknowns we can calculate in one cut.
Let's start with a cut through members 2, 7, and 12 and make a left view.

We write the equilibrium equations
The so-called Ritter's points are points where the directions of two unknowns intersect.In the above figure, forces N2 and N7 intersect at point (1) and forces N7 and N12 intersect at point (2) - these are the Ritter's points. Most often, we write the sums of moments at the Ritter's points; sometimes there may be more than two points if the forces are at different angles, then we can write three equations in the form of sum of moments.
If we have only two Ritter's points like here, it doesn't matter, we write two sums of moments and as the third equation we can write either the sum of projections on the "x" axis or (preferably) on the "y" axis, because only the force N7 enters this equation.
We can also write the sum of moments at another point to calculate the last unknown, here point (3) is determined.

We do the same for the intersection of members 1, 5, 11.
Left view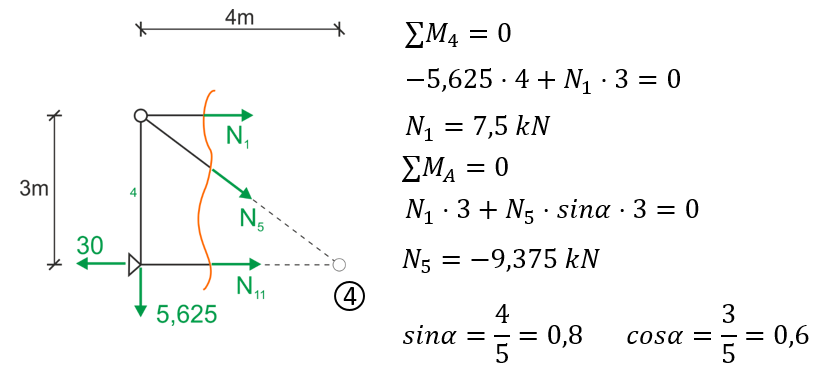
Finally, we have the intersection of members 3, 9, 13.
Right view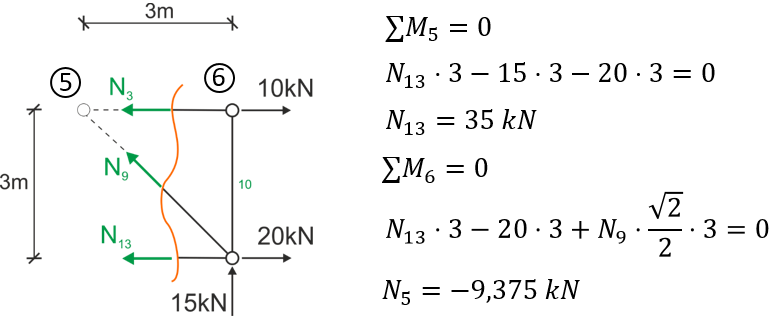
Step 5
Finishing the task solution.Let's draw a graph of normal forces in the members that we have already calculated.
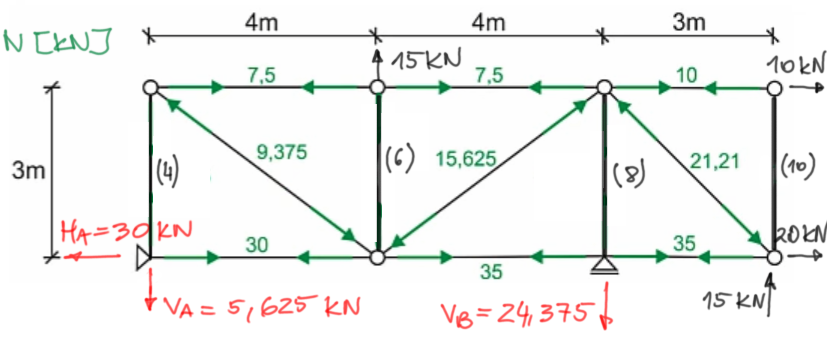 Graph of normal forces, labeling:
We have calculated the forces in most of the members (9 out of 13). We have four members left (vertical 4, 6, 8, and 10), and we have three options:
- make more cuts, but now we need four separate cuts to calculate these forces, which somewhat defeats the purpose.
- create node equilibrium at A, B, (3-10), and (1-2-6) and add the last four forces, it is definitely easier to draw a single node than to make larger cuts,
- cleverly notice that:
1) from the second theorem of zero-force members, member (10) is zero,
2) from the second theorem it actually follows
additional rule - if a force loads a node in such a way that its direction is collinear with one of the members and no other force can be projected onto this line, then the force in the member is collinear with it.
Let's look at the lower chord and node B - the force of 35 kN in the horizontal member is transferred from member to member as seen on the graph
while the reaction VB = 24.375 kN collinearly loads member (8) - so it directly transfers the tensile force to it (because we see that reaction VB acts on member (8) in a way that stretches it).
so finally we know the force in member (8)
3) the same applies to N6=15 kN
4) the same applies to N4=5.625 kN
Step 5
Draw the final graph of normal forces.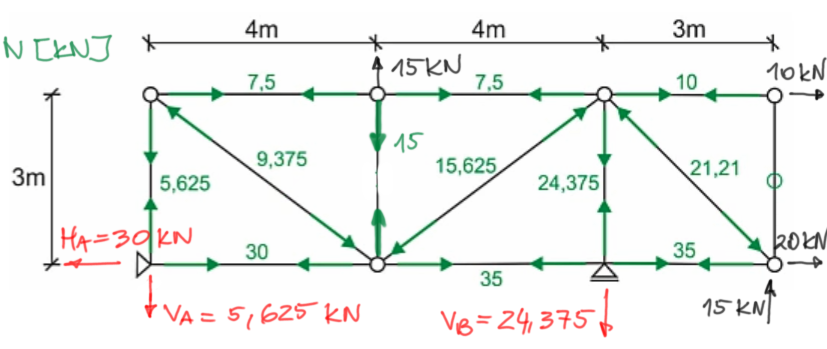
If you have any questions, comments, or think you have found a mistake in this solution, please send us a message at kontakt@edupanda.pl.
